The following article describes a small proof of concept on how to deploy a sample JEE application. The purpose of that application is the show a transition path from traditional JEE applications requiring a huge application server installation to a more self-contained, still JEE compliant application with a smaller footprint.
Introduction
The application serves a modest purpose, it should provide a greeting service whereas each greeting will contain a structured timestamp as well as a configurable greeting message.
The core objectives should include:
– providing an application bundling all dependencies necessary to run without any need for a runtime environment besides Java (aka uber-jar),
– sticking to the JEE standard using compliant frameworks eg. for dependency injection, OR mapping or exposing services
– deploying and running on (Pivotal) Cloud Foundry with a simple cf push and the common java buildpack.
The Eclipse MicroProfile and its implemenation by thorntail specification should be a viable starting point for that transformation. Thorntail itselves is described by:
„Thorntail offers an innovative approach to packaging and running Java EE applications by packaging them with just enough of the server runtime to „java -jar“ your application. It’s MicroProfile compatible, too. And, it’s all much, much cooler than that … “
(from https://thorntail.io/)
The generator from https://thorntail.io/generator/ allows for an easy initial project creation including all dependency definitions. The generated example used here can be found at https://bitbucket.org/0x0me/cloudy-microjee. This project was generated with JAX-RS, Microprofile Health and Microprofile Config selected.
The produced project already contains an application class as well as a simple service class. The application could be packaged into an uber-jar and started using the accompanying maven pom.
Exploring the project
The application could be started by executing the maven goal from the thorntail maven plugin:
mvn thorntail:run. It will be started at port 8080 by default.
All contents below src/main/webapp will be served under / if not configured otherwise. The base path for the REST services is specified in CloudyMicroJEEApplication class:
import javax.ws.rs.ApplicationPath;
import javax.ws.rs.core.Application;

// configure base path for provided REST services
@ApplicationPath("/services")
public class CloudyMicroJEEApplication extends Application { }
Lets build a simple stateless EJB providing the local time to its consumers:
import javax.ejb.Stateless;
import java.time.LocalDateTime;

@Stateless
public class LocalTimeService {

    public LocalDateTime getCurrentTime() {
        return LocalDateTime.now();
    }
}
The following REST service uses the EJB-service to provide the local time as a JSON object to its clients. Clients can request the current time using the path /services/current-time:
mport javax.ejb.EJB;
import javax.enterprise.context.ApplicationScoped;
import javax.ws.rs.GET;
import javax.ws.rs.Path;
import javax.ws.rs.Produces;
import javax.ws.rs.core.Response;
import java.time.format.DateTimeFormatter;
import java.util.HashMap;
import java.util.Map;

@ApplicationScoped
@Path("/current-time")
public class TimeServiceEndpoint {

    @EJB
    private LocalTimeService localTimeService;

    @GET
    @Produces("application/json")
    public Response getCurrentTime() {

        String timestamp = localTimeService.getCurrentTime().format(DateTimeFormatter.ISO_LOCAL_DATE_TIME);

        Map<String,String> data = new HashMap<>();
        data.put("localtime", timestamp);
        return Response.ok(data)
                .build();
    }
}
Next implement the greeting service which uses the LocalTimeSevice EJB for generating timestamps and read in an application or environment property to provide a confingurable greeting message:
import dev.mindcrime.eval.microprofile.cloudfoundry.mpcfhello.rest.timeservice.LocalTimeService;
import org.eclipse.microprofile.config.inject.ConfigProperty;

import javax.ejb.EJB;
import javax.enterprise.context.ApplicationScoped;
import javax.inject.Inject;
import javax.ws.rs.Path;
import javax.ws.rs.core.Response;
import javax.ws.rs.GET;
import javax.ws.rs.Produces;

@ApplicationScoped
@Path("/hello")
public class HelloWorldEndpoint {

    @Inject
    @ConfigProperty(name = "greeting.message")
    private String greeting;

    @EJB
    private LocalTimeService localTimeService;

    @GET
    @Produces("application/json")
    public Response doGet() {
        HelloMessage msg  = HelloMessage.builder()
                .message("Thorntail says:"+ greeting)
                .timestamp(localTimeService.getCurrentTime())
                .build();

        return Response.ok(msg)
                .build();
    }
}
For now the greeting message is defined in /src/main/resources/META-INF/microprofile-config.properties:
greeting.message=Hello, welcome to my application.
Deploy to Cloud Foundry
Please note, for more information on how to install and run Pivotal Cloud Foundry on locally on the workstation consult https://pivotal.io/platform/pcf-tutorials/getting-started-with-pivotal-cloud-foundry-dev/introduction.
Besides pushing the application into the cloud as it is, it can be set up and customized using the manifest.yml file:
---
applications:
  - name: cloudy-microjee
    buildpack: java_buildpack
    instances: 1
    memory: 1G
    random-route: true
    path: target/cloudy-microjee-thorntail.jar
Add Health Service
Health checks are used to enable a supervisor (eg. an application, a cloud application controller or a kubernetes service controller) to determine the current state of the application. Depending on the outcome on the health check the supervisor could decide to restart or replace the application by a healthy instance.
To foster a meaningful decision instead of using a port type health check, the application could expose some health state based on internal conditions. The JEE Microprofile supports application health REST endpoints by applying MicroProfile Health to the project.
Implementing a health service could be as easy as:
import org.eclipse.microprofile.health.Health;
import org.eclipse.microprofile.health.HealthCheck;
import org.eclipse.microprofile.health.HealthCheckResponse;

import javax.enterprise.context.ApplicationScoped;

@ApplicationScoped
@Health
public class HealthCheckService implements HealthCheck {

    @Override
    public HealthCheckResponse call() {

        return HealthCheckResponse.builder()
                .name("cloudy-microjee")
                .withData("free-memory", Runtime.getRuntime().freeMemory())
                .withData("max-memory", Runtime.getRuntime().maxMemory())
                .withData("total-memory", Runtime.getRuntime().totalMemory())
                .up()
                .build();
    }
}
Finally update the manifest to use a HTTP Health Check:
---
applications:
  - name: cloudy-microjee
    buildpack: java_buildpack
    instances: 1
    memory: 1G
    random-route: true
    path: target/cloudy-microjee-thorntail.jar
    health-check-type: http
    health-check-http-endpoint: /health
and push it to the cloud again:
$ mvn package thorntail:package
$ cf push
Configuration by environment
The configuration of the application can be easily customized using user provided variables. Let’s check the current reponse from the hello service:
$ http http://cloudy-microjee-fearless-bat.local.pcfdev.io/services/hello
HTTP/1.1 200 OK
Content-Length: 273
Content-Type: application/json
Date: Sun, 17 Mar 2019 22:49:31 GMT
X-Vcap-Request-Id: 1be38cb1-568c-4742-4795-e9ba94409425

{
    "message": "Thorntail says:Hello, welcome to my application.",
    "timestamp": {
        "chronology": {
            "calendarType": "iso8601",
            "id": "ISO"
        },
        "dayOfMonth": 17,
        "dayOfWeek": "SUNDAY",
        "dayOfYear": 76,
        "hour": 22,
        "minute": 49,
        "month": "MARCH",
        "monthValue": 3,
        "nano": 653000000,
        "second": 31,
        "year": 2019
    }
}
The user can provide environment variables either by using the cf command line tool:
$ cf set-env cloudy-microjee 'greeting.message' 'It really shines in the cloud!'
$ cf restage cloudy-microjee
or the application manager web application:
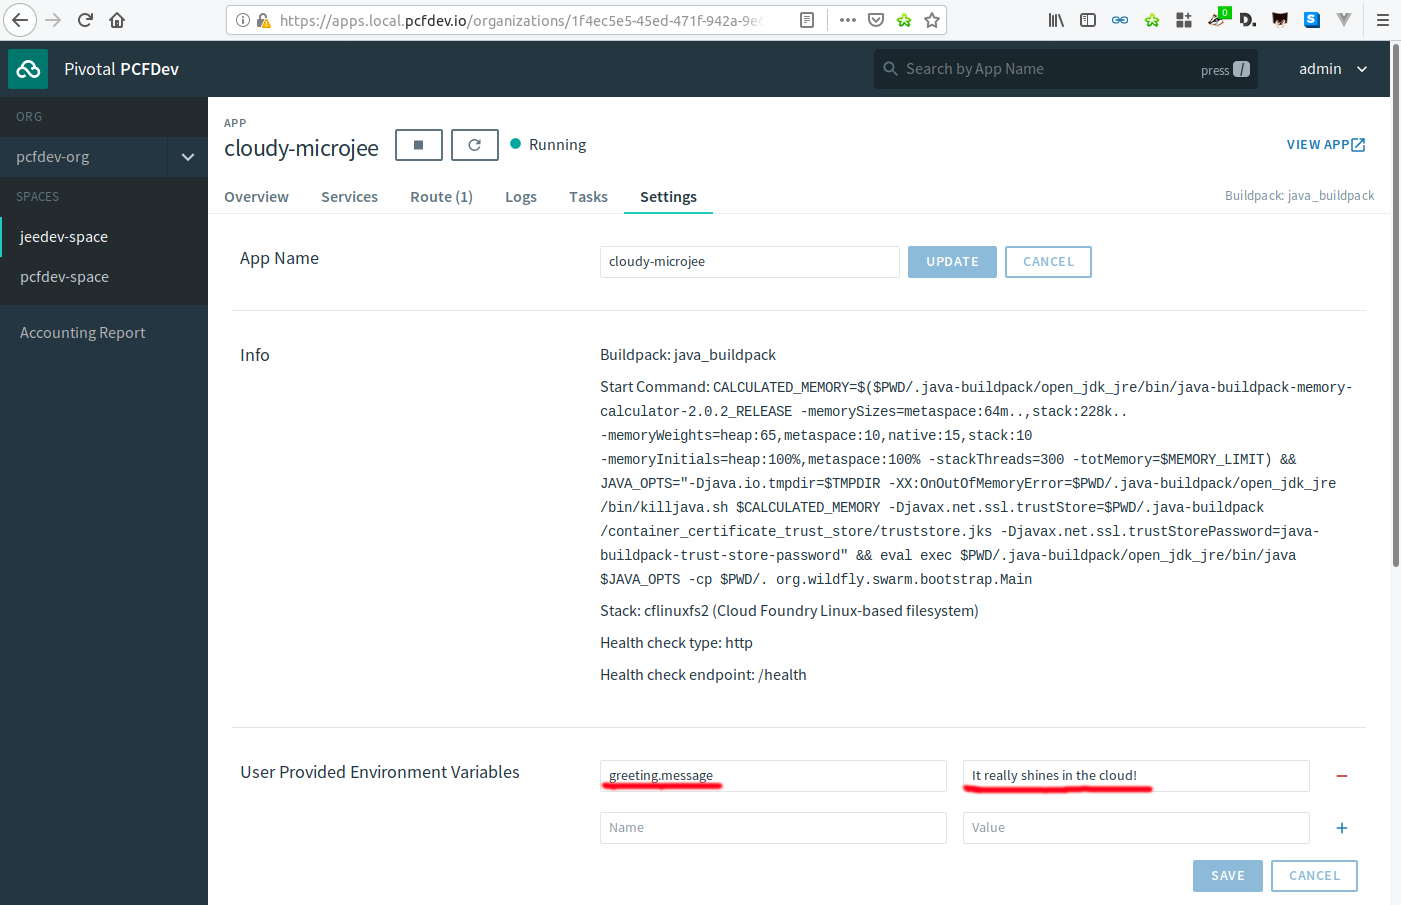
After adding greeting.message as shown above the message in the service response is updated to the newly set value (This example uses httpie as a command line client):
$ http http://cloudy-microjee-fearless-bat.local.pcfdev.io/services/hello
HTTP/1.1 200 OK
Content-Length: 269
Content-Type: application/json
Date: Sun, 17 Mar 2019 22:57:28 GMT
X-Vcap-Request-Id: 5a958b5e-ae51-4fda-7d64-ea37915fbe98

{
    "message": "Thorntail says:It really shines in the cloud!",
    "timestamp": {
        "chronology": {
            "calendarType": "iso8601",
            "id": "ISO"
        },
        "dayOfMonth": 17,
        "dayOfWeek": "SUNDAY",
        "dayOfYear": 76,
        "hour": 22,
        "minute": 57,
        "month": "MARCH",
        "monthValue": 3,
        "nano": 12000000,
        "second": 28,
        "year": 2019
    }
}
This article shows how to set up a simple JEE application based on the Eclipse Microprofile and Thorntail and running it on Cloud Foundry. It explores some basic features like Health Checking and configuration by the environment.